Windows
The following section will show you how to set up DNS Firewall on Windows devices.
You must have an enterprise DNS Firewall account with at least one API credential generated.
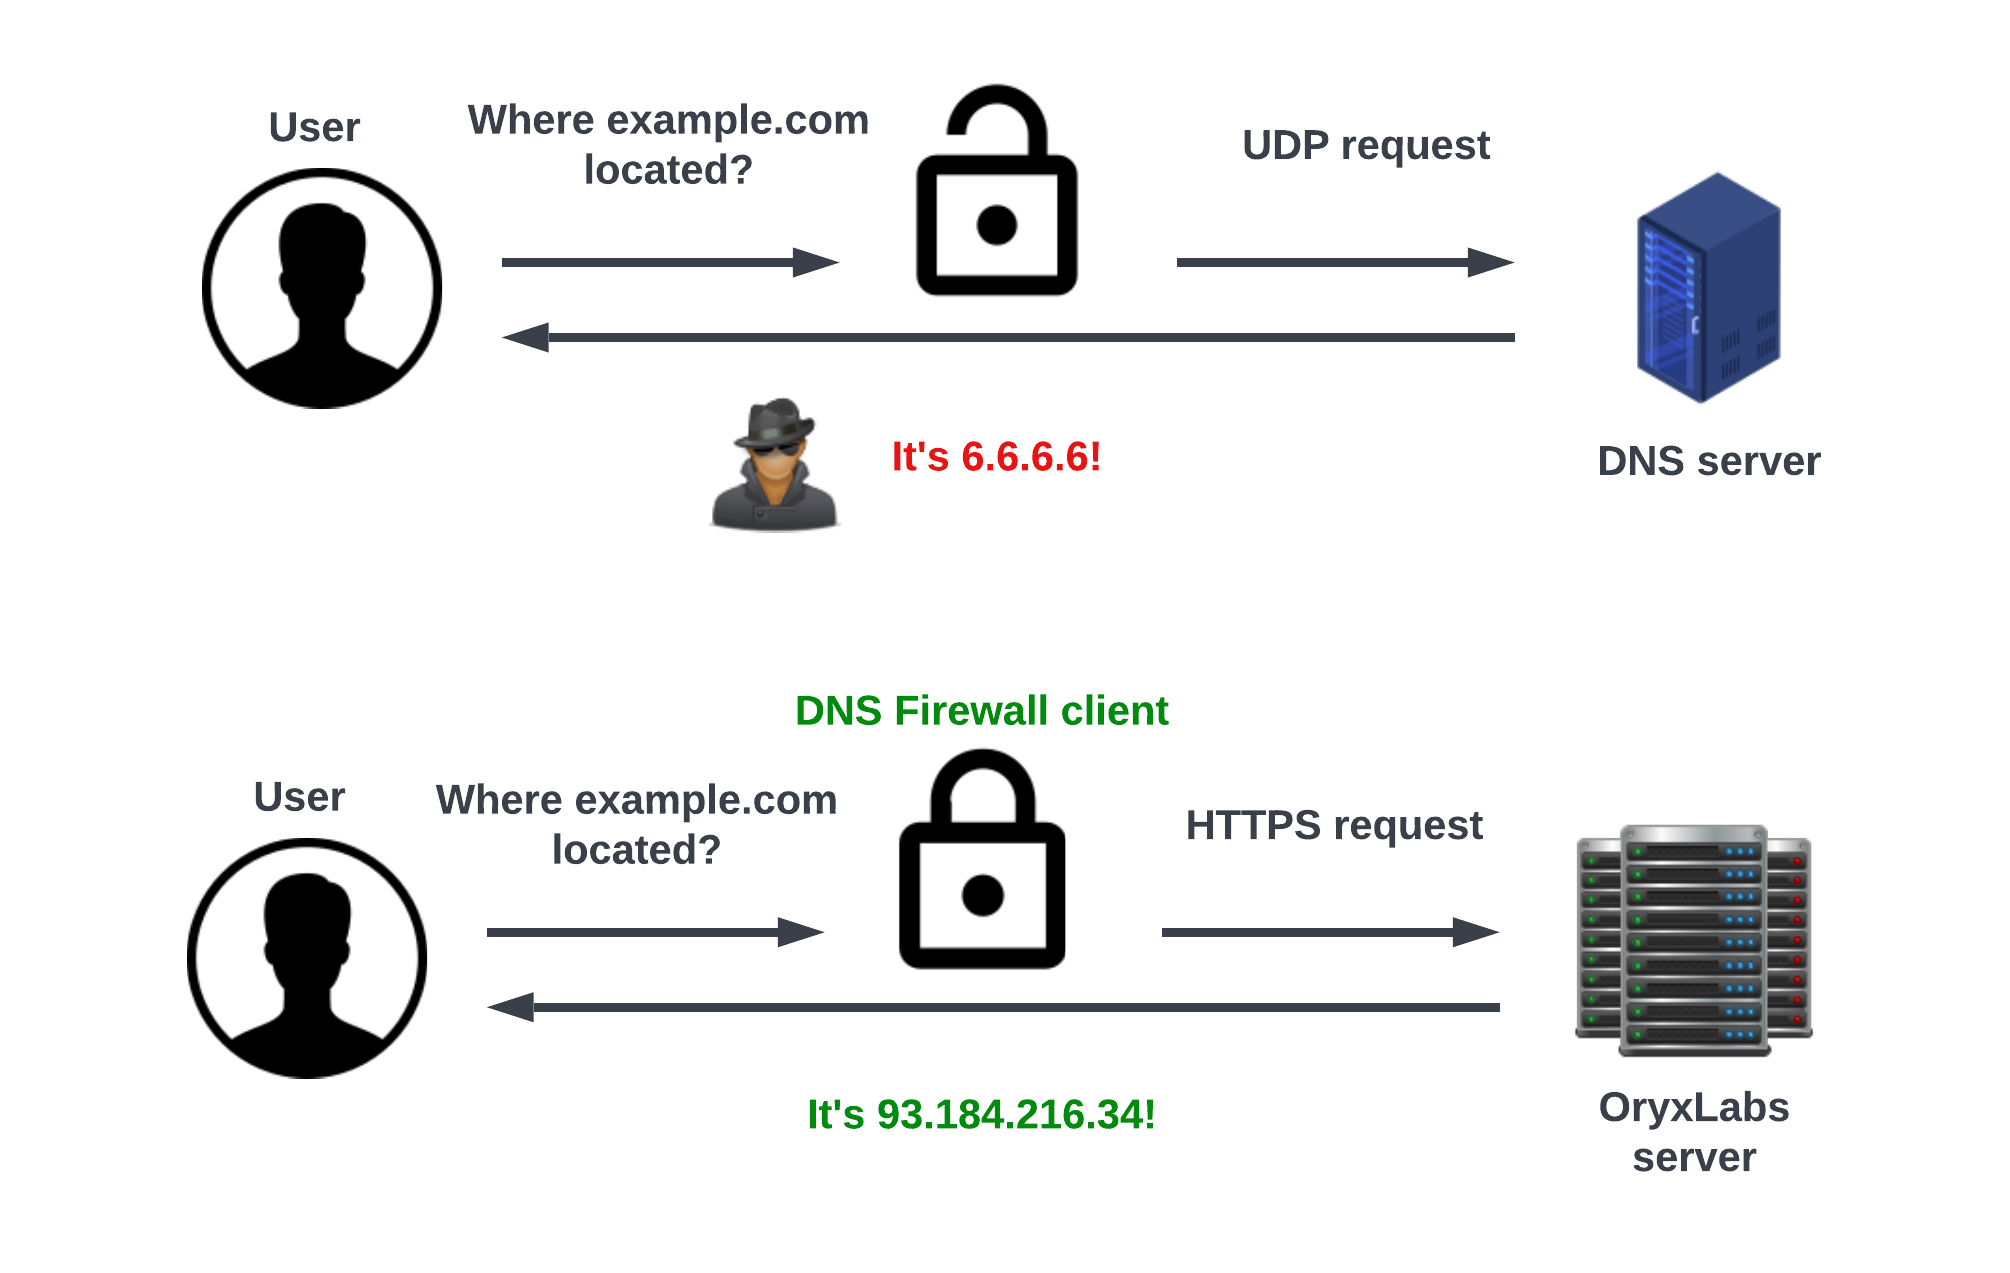
An illustration of the DNS over HTTPS (DoH). In one of the real cases, DNS queries could be intercepted by the attacker and the DNS response would point to attacker’s server instead of the real one. DoH uses HTTPS protocol to encrypt data between the User and DNS server in order to increase security and privacy.
Integration With Windows 11
Microsoft windows 11 has a native support for “DNS over HTTPS”. The installer will set up the DNS configuration in the network settings. Once it’s done, system will send DNS queries using HTTPS and DNS Firewall address.
Integration With Version Prior to Windows 11
Microsoft Windows, prior the version 11, do not provide any native support for “DNS over HTTPS” queries. Hence, our windows installer simulates this behavior. It sets up a listener on port 53 to catch the DNS traffic and converts this UDP/TCP traffic to HTTPS traffic.
Once the listener is ready, the installer will replace the current DNS configuration with a configuration pointing to DNS Firewall local listener.
The installer sets up the listener on both interface IPv4 (127.0.0.1) and IPv6 (::1).
Installation
- Download DNS Firewall Roaming Client:
- Navigate to Roaming Clients > All Roaming Clients > Add New
- Select 'Desktop' followed by 'Windows'
- Download appropriate version of the program (Zip archive file): 32-bit or 64-bit, based on your computer's architecture.
- Unzip the Archive:
- Locate the downloaded ZIP archive file (e.g.,
roaming-client.zip) on your computer. - Right-click on the file and select "Extract All" or use your preferred unzip software.
- Choose a destination folder where you want to extract the files and click "Extract."
- Locate Installation Files:
- Inside the extracted folder, you should find two important files:
- dnsfirewall-roaming-client-{version}-{architecture}.msi: This is the installation package.
- config.json: This file contains configuration settings, including credentials needed for installation.
- Install DNS Firewall Roaming Client:
- Double-click on the installation package file to start the installation process.
- Follow the on-screen instructions provided by the installer.
- During installation, the program will automatically retrieve the necessary credentials from the config.json file, so you won't need to enter them manually.
- Typically, you'll need to click "Next" a few times and accept the license agreement
- Dashboard Integration:
- After installation, the DNS Firewall Roaming Client will secure your computer, and your device will be added to the UI dashboard (https://dnsfirewall.oryxlabs.com/dashboard) for monitoring and management.
This installation guide covers the steps to download, extract, and install the Roaming Client on a single computer. Remember to consult the support for any specific configuration or troubleshooting information related to your organization's needs.